Signing in

- Email and password — create an account with your email address and a password, or sign in to an existing account.
- Google — sign in with your Google account for faster access. If you do not already have a Socializioz account, one is created automatically using your Google profile.
Sign-in troubleshooting
Workspace setup wizard
The primary onboarding flow creates your workspace and walks you through your first key actions.
1
Create your workspace
Enter a name for your workspace. This becomes the shared space where all your posts, campaigns, media, and connected accounts live. You are assigned the Owner role automatically.
2
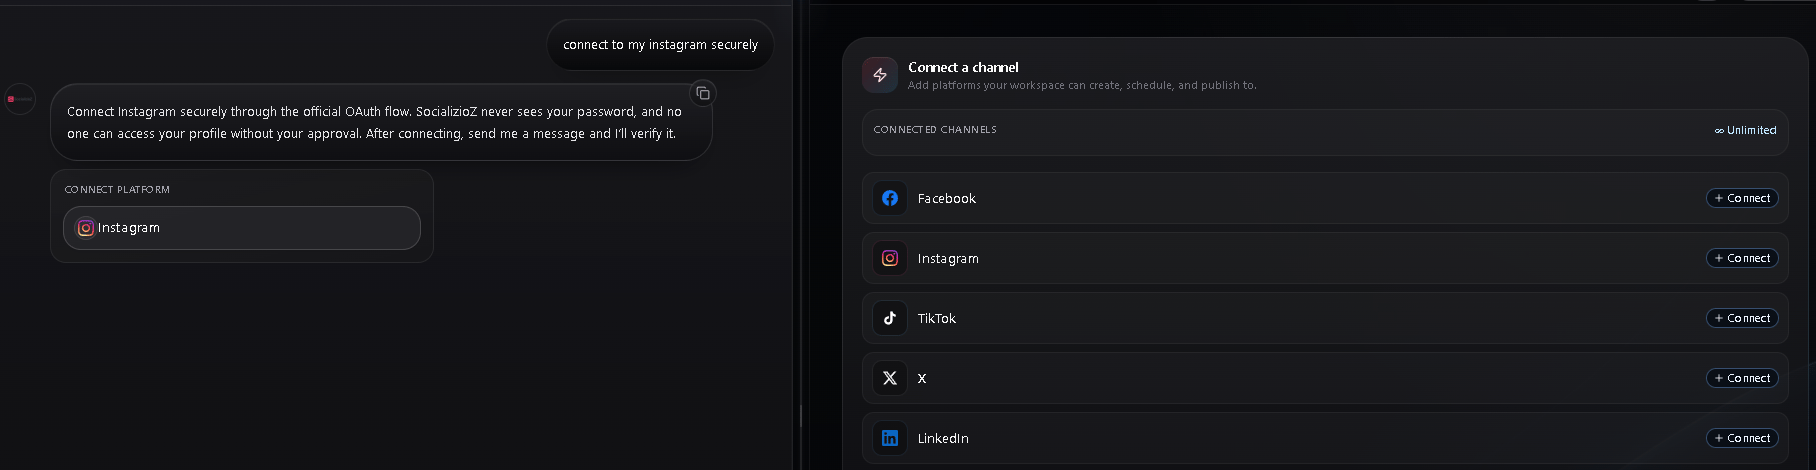
Connect a social account
3
Set up your brand profile (optional)

4
Create your first post with Socializioz Agent
Draft a quick post to see how the composer works. The post is saved as a draft so you can edit and publish it when you are ready. This step is optional.
5
You're all set
Setup is complete. You are taken to the workspace overview to start managing your social presence.
Skipping optional steps
Steps 3 (brand profile) and 4 (first post) each have a Skip for now button. Skipping advances to the next step without saving anything. You can configure your brand profile later from workspace settings and create posts from the composer at any time. Steps 1 (workspace) and 2 (connect an account) are required. You cannot skip them — the Continue button on step 2 stays disabled until at least one social account is connected.Resuming the wizard
If you navigate away from the onboarding wizard (for example, to connect accounts on the connections page), the wizard remembers your progress. When you return, it picks up at the step you left off. The current step is stored in the URL as a?step= parameter, so you can also resume by navigating directly to a specific step.
If you already have a workspace from a previous session, the wizard detects it and skips onboarding entirely, taking you straight to the workspace overview.
Personalization survey
In addition to the workspace setup, a personalization survey may appear as a modal overlay. This helps Socializioz tailor the experience to your workflow:1
Choose your business type
Select the category that best describes you:
- Creator / Influencer — personal brand or content creator
- Agency / Marketer — managing multiple clients
- Business / Brand — company social presence
- Personal Use — managing your own accounts
2
Set your goals
Pick one or more goals you want to achieve:
- Grow followers
- Save time on content
- Increase engagement
- Track performance
- AI-generated content
- Multi-platform posting
3
Select platforms
Choose which social platforms you plan to manage: Instagram, Facebook, TikTok, X (Twitter), LinkedIn, or Telegram. This pre-selects platforms for you on the Connections page.
4
Quick tour
A brief overview shows how Socializioz works: connect your accounts, create content with AI, and schedule posts. You can skip this step if you prefer to explore on your own.
Interactive guided tours
After onboarding, interactive guided tours appear the first time you visit key pages. Each tour spotlights specific UI elements one at a time with a highlighted overlay, so you can see exactly where each feature lives. A tooltip next to the highlighted element explains what it does and how to use it. Tours are available on:- Home (workspace overview)
- AI chat
- Connections
- Composer
- Published posts
- Analytics
- Campaigns
Tour controls
Each tour step includes:- Next and Back buttons to move between steps
- A Skip button to dismiss the tour entirely
- A step counter showing your progress (for example, “2 of 5”)
Contextual tooltips
In addition to full-page tours, contextual tooltips appear on specific features the first time you encounter them. Tooltips are available on the composer, connections page, analytics dashboard, AI chat, and media library. Each tooltip highlights a key capability and dismisses permanently after you close it.After onboarding
Once setup is complete, you can:- Open the AI chat and ask the Socializioz Agent to plan, create, schedule, publish (with your approval), or analyze content
- Visit Connections to link additional social accounts
- Open the composer to create and publish posts yourself
- Browse the schedule to plan content ahead
- Configure your brand profile for better AI-generated content
Troubleshooting
Related
- Connecting social accounts — link your social platforms to Socializioz
- Create your first post — step-by-step guide to publishing your first content
- Workspace overview — your dashboard after onboarding
- Brand profiles — configure your brand voice for AI-generated content
- Download and install — get Socializioz on your device